Homemade Bagel: All of the Deliciousness, None of the Junk!


Hello Bakers,

How many of you have been disappointed by supermarket bagels or even chain bagels?
I know I have been - driven by desperation to grab a fluffy processed bagel or a bag of them.
I used to try to convince myself that these things would be ok once they were toasted but
they aren't. Nothing is as delicious as a well made bagel.
Bagels are easy for us to make at home. Bagels rise (or ferment) only one time. Then they are poached, shaped and baked.
They can be topped with anything or nothing. The choice is yours.
Bagels are also a fun project to make with kids. They especially enjoy the shaping and the eating.
My culinary students turn into kids on bagel day - the only thing that makes them happier then
making bagels is making cinnamon rolls.
Another plus for bagels is that the baking time is short compared to other yeasted breads making a bagels a natural choice for summer baking.
Homemade bagels freeze for up to one month.


My go to bagel formula comes from Michael Kalanty's excellent book "How to Bake Bread",
published by Red Seal Books.
If you enjoy making bread and you do not have this book order it immediately.
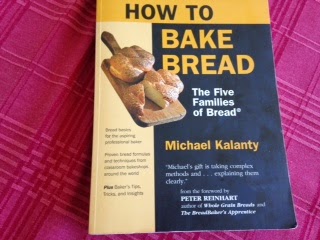
This is the book.


I use this book as a textbook in my Artisan Bread Class at the Art Institute of Hollywood. All of the breads in the book are delicious and more importantly, they all work perfectly.
Chef Kalanty is a friend and colleague of mine and it is with his permission that I can pass the formula
on to you.
My only change is that I add a little more honey to the liquid the bagels are simmered. Years ago, I took a field trip to Montreal to study bagel making and noted that the bagels were boiled in a honey and water mixture.
When I asked the bakers how much honey was added to the water, they told me enough to make it look like weak tea.
There are two great cities for bagels in North America, one is New York and the other is Montreal
If you do not live in New York or Montreal you only option is to master the recipe that follows and make your own.

Bagels -
(Formula reprinted with permission from the author and publisher)

This recipe yields 12 - 4 ounce bagels
It is best scaled in grams.

Equipment:
A stand mixer with a dough hook attachment
or a a dough whisk and a good sized mixing bowl.
A baking sheet lined with parchment brushed with vegetable oil
A large pot filled 1/3 of the way with water. Add enough honey to the water so that it looks like
weak tea.
Skimmer or Spider for fishing your bagels out of the boiling water
XL Ziploc bag for proofing, cup for hot water
Oven Temperature: 375 degrees

Ingredients
505g water (cool body temperature)
5g Instant yeast
10g sugar
15g canola oil or non-olive vegetable oil
450g Bread Flour (I use King Arthur Bread Flour or Gold Medal Better for Bread)
15g salt

Optional toppings: sesame seeds, poppy seeds, onion flakes, kosher salt.
You can also make an everything mix with equal parts sesame seeds, poppy seeds, fennel seeds, garlic flakes, onion flakes and kosher salt.

1. In a stand mixer, fitted with the dough hook, combine the water, yeast, sugar, oil, flour and salt.
2. Mix on speed one for about 4 minutes until the dough reaches "clean up" stage.
3. Increase to speed two and mix for 3 more minutes. You may here the dough slap against the side of the mixer bowl. In bagel speak this is referred to as the dough being "bucky".
4. Turn the dough out onto your work surface and knead it briefly by hand.
5. Place it in a lightly oiled bowl, cover the bowl and place in a warm spot to rise.
If you are a devotee of my Ziploc bag technique - place the bowl in the bag with a large cup filled 3/4s of the way with steaming water. Zip the bag shut and let the bagels ferment for 1 hour.
The ideal proofing temperature is 80 degrees.
6. After an hour, gently degas the dough and divide it into 4 ounce (114g) pieces.
7. Shape the pieces into rough torpedo shapes and let rest on your work surface, covered, for 15 minutes.

8. Turn the heat on under your pot of honey water - bring it up to a simmer.
9. Roll the bagels into a strand about 12-14" long. Join the ends by overlapping them. Roll over the join with the palm of your hand.
10. Once all the bagels are shaped poach the bagels in the simmering water for 20 seconds on each side. Place them on the oiled baking sheet about 2" apart.
11. Sprinkle with desired toppings. If the tops of the bagels become dry, spray them with a little water so your toppings will stick.
12. Bake at 375 for 20-25 minutes.
13. When the bagels are done they are an overall golden brown. They should not feel heavy or look pale. If they do bake for an additional 5-7 minutes.
Happy Baking!
Colette


Cinnamon Apple Loaf: How Two Tired Apples Were Transformed

                                                                   
Hi Everyone,
This morning I discovered that I completely missed the two organic Honeycrisp apples in the bottom of the
big Ikea fruit bowl. Poor things - the had been covered over by the bananas, pears and cara cara oranges.
Well, they were two wrinkled to eat and they would not have made enough sauce to feed a baby if I had one.
The only thing to do was to turn them into this delectable bread. There is something so old fashioned and comforting about this loaf cake. It reminds me of my step grandmother's apple cake - it was baked in a 9x13" pan and iced with a boiled cider icing.
The loaf version is a little lighter on oil and sugar - the cinnamon sugar stands in for the icing.
Enjoy a thick slice with a mug of steaming coffee or tea. It is also perfect to brighten up a packed lunch
Happy Baking!
Colette

Cinnamon Apple Loaf
Yield: one loaf

Oven: 350 degrees
Pan Prep: Grease or spray an 8 ½”x 4” loaf pan and line the long side with parchment paper.
The paper should extend over the edge of the pan by 1”.

1 ½ cups +1 tablespoon (6.75 ounces) unbleached all purpose flour
¾ teaspoons baking powder
½ teaspoon baking soda
¼ teaspoon salt
½ teaspoon cinnamon
¼ teaspoon nutmeg

¾ cups (5 ¼ ounces) sugar
½ cup vegetable oil
3 Tablespoons (1 ½ ounces) melted butter
1 ½ teaspoons vanilla extract
2 eggs

2 apples, peeled and cut into small dice or grated
Optional: ½ cup chopped walnuts or pecans

Topping: Cinnamon sugar (1/2 cup sugar + 2 teaspoons cinnamon)

1.       Sift the flour, baking powder, baking soda, salt, cinnamon and nutmeg into a bowl.
2.       In a separate bowl, whisk the sugar, oil, melted butter, vanilla and eggs until smooth and light in color – about 2 minutes.
3.       Add the wet ingredients to the dry ingredients. Mix only until they are combined.
4.       Add apples and optional nuts.
5.       Pour into prepared pan.
6.       Sprinkle with cinnamon sugar

7.       Bake for one hour – check the center with a skewer or cake tester.
8.       If the cake tester does not come out clean – then bake for an additional 7 minutes and check again.
9.       Let the cake cool in the pan for 10 minutes before moving to a rack
This loaf freezes beautifully - up to one month.

Beauty and the Baguette: Baking with a Fifty Year Old Starter


Hi Everyone,

Recently, one of my students, Tyler gave me some fifty year old sourdough starter. 
Yes, fifty years old and rocking strong.  We had about 12 ounces and we promptly named him "50 cent" after the rapper.
Tyler had been working at Chef Phillip Lee's restaurant "Scratch" on La Cienaga in Los Angeles. "50 cent" had been brought to the kitchen by one of the sous-chefs, Ryan.
50 cent had been in Ryan's family for fifty years. He looked and smelled great. He is the George Clooney of starters.

 When he arrived 50 cent was more bubbly and strong then my beloved starter, Sofia. Great care had been taken of him over the years. I was very impressed and delighted. A new family member - Sofia's long lost grandfather.

I began feeding him 50% filtered water and 50% Harvest King Bread flours I was instructed. At home, I use Gold Medal, Better for Bread to feed my starters and for my bread baking.
The other important thing I did was to bring a portion of 50 cent home - just in case something would happen to the refrigeration at work and I would lose him. 
I have some Sofia at home as well. I keep them both strong and healthy - it's important to always have a back up when you are working with sourdough at work.

Yesterday I made my first baguettes with 50 cent. They turned out great. The recipe is inspired by the River Cottage Bread Book.
The dough is very sticky but it needs to be for a good open crumb.
It can also be overnight fermented in the refrigerator to develop more flavor.

yield: 2 baguettes
330 grams water
3-5g instant yeast (use less if the starter is very active) (optional if your starter is very strong)
4 ounces starter 
500g bread flour
10g salt
1. Combine water, yeast and starter in the mixer bowl.
2. Add flour and salt.
3. With the dough hook on speed 2 mix the dough for 4 minutes until it clears the side of the bowl.
It may stick to the sides and the bottom of the bowl - resist the urge to add extra flour.
4. Remove the dough from the bowl and stretch and fold a few times to smooth the dough.

5. Place the dough in a bowl, cover, and let rest for 45 minutes.
6. After 45 minutes, stretch and fold again. Repeat this process 3 more times.
7. Let the dough rest 10 minutes after the final fold and divide in half.
8. Shape into logs and let rest for 10 minutes, covered. **They were covered right after I took the photo.

9. Shape into baguettes, place on a parchment lined floured sheetpan or in an oiled baguette tray.
10. Preheat the oven to 425 degrees.
11. Place the baguettes in the proofing bag with a mug of steaming water.

12. Let proof until the baguettes have risen about 1/3 and have a marshmallow texture. The baguettes are proofed when you gently squeeze the sides of the baguette and you finger indentation does not spring back.
13. Dust the baguettes with flour, slash the baguettes (5 slashes are typical) and lightly spray the surface with water.
14. Place the baguettes in the hot oven and spray the oven door with a light mist of water.
15. Check at 25 minutes. The baguettes should be golden brown and feel light when you pick them up.
Use a towel or a oven mitt as they are hot. They will probably need a 5-7 minutes more baking time.
If the baguettes are getting too dark, turn the oven temperature down 25 degrees.
Let them cool and enjoy.
Happy Baking!
Colette